Using School-Day’s Enhanced Product Forms for Mobile Devices
We’re pleased to announce that we’ve streamlined the ordering process on our mobile platform for Parents. Enhanced Product Forms allow parents to easily place food product orders for multiple dates and topping selections. Parents are now able to place orders for one or more students for the same items in just a few simple taps. • Enhanced Product Forms are available only on Products, and only if a school has created them specifically so that an Enhanced Product Form is available. • If you do not have a mobile device but wish to take advantage of Enhanced Product Forms, you can access Parent Mobile from your desktop device. • Enhanced Ordering is not available on our regular Desktop portal.
-
1
Using your mobile or desktop device, go to https://school-day.app/#!/ and log in.
-
2
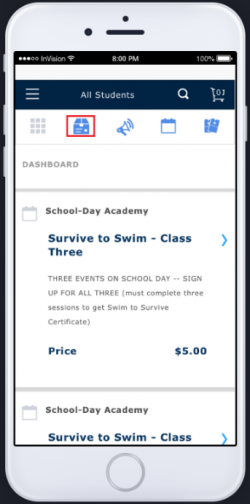
Tap on the Product icon to view all available Products.
-
3
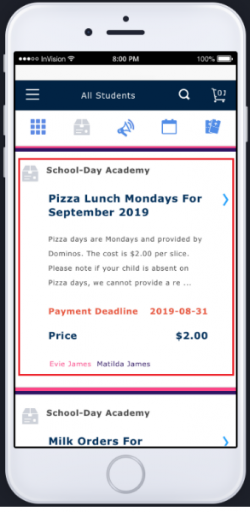
Tap anywhere on a Product to go to the Product page.
-
4
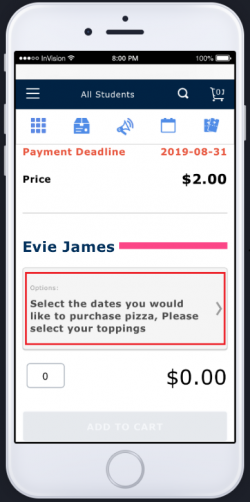
Scroll up on the Product page until you reach the Product Form attached to it, if applicable, then tap the Options section.
-
5
Tap on Add Dates.
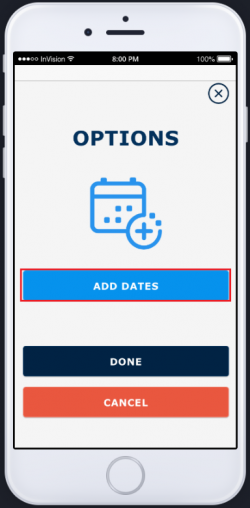
- Please note if the Add Dates screen does not appear, the product does not contain an Enhanced Product Form.
-
6
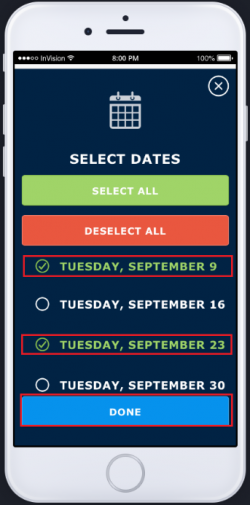
Tap on the dates you would like to order the Product for, then tap on Done.
-
7
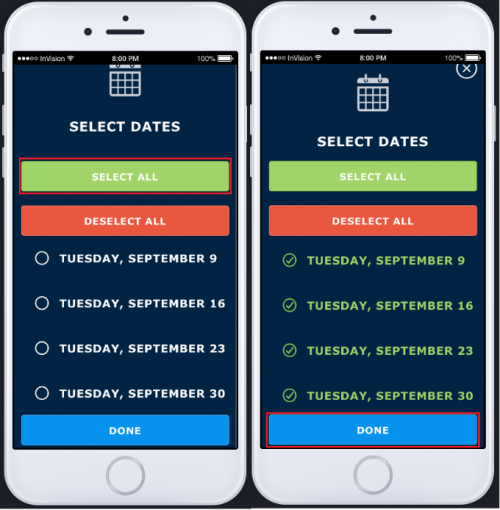
To order a Product for all available dates, tap on Select All, then tap on Done. Tap on Deselect All to remove all selected dates or tap on an individual date to remove it.
-
8
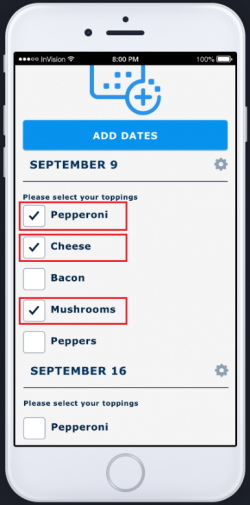
Tap on the form options you would like to select for the first date you have selected and continue to scroll up to select options for additional dates.
-
9
To apply the same input to all available dates, tap on the settings icon by the first date for which you have selected form options.
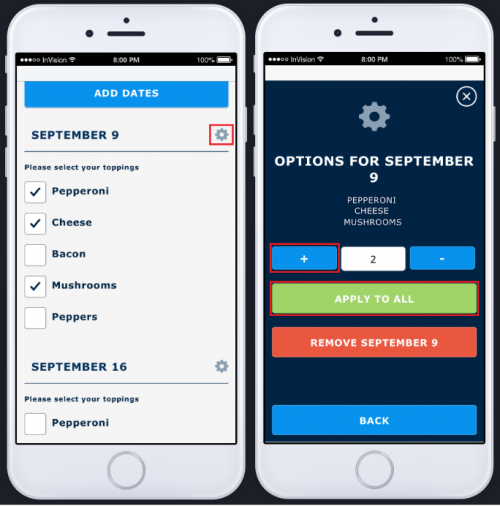
- To order more than one product for a selected date, tap on the + button. The default quantity is one.
- After you have the desired quantity for a selected date, tap on Back to exit, or Apply To All if you wish to apply the same quantity to all dates.
- Tap on Remove to remove a selected date, or Back to get back to the form option selection screen.
-
10
To verify the order in progress, scroll up on your screen and Tap on Done to move forward with your order. The selected form options will be applied to all of the dates you selected.
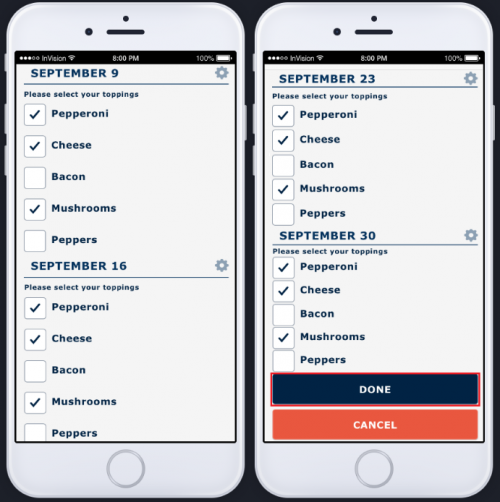
- To add or remove options from a specific date, tap on any form options on any date. If you have selected Apply All, changes made on an individual date will automatically be made to all selected dates.
- To apply a form option change to all the selected dates, tap on the settings icon by that date and repeat step 8.
- To change the quantity of items for all the selected dates, tap on the settings icon by that date and repeat step 8.
-
11
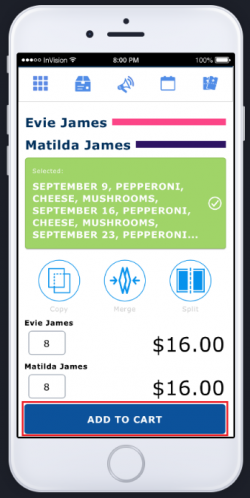
Once all dates and form options have been submitted, the options, quantities, and total cost will be displayed for your student, and the Add To Cart option will be available. Tap on the green form options section if you wish to review all form options selected prior to adding the item to your cart.
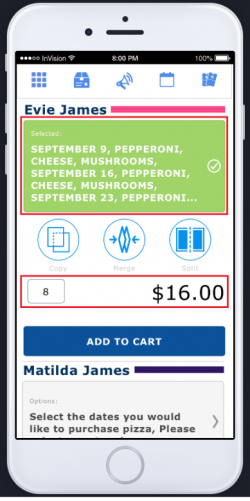
- The total cost is automatically calculated based on the cost of the product multiplied by the quantity of items per selected date.
- The total cost is automatically calculated based on the cost of the product multiplied by the quantity of items per selected date.
-
12
If you have two or more students linked to your School-Day account, and if the product is available for those students, you may wish to Copy the form dates, options, and quantities selected from one student to another, or Merge students together so they share the exact same form dates, options, and quantities. Tap on the desired option to Copy or Merge the form, then complete the Copy or Merge process.
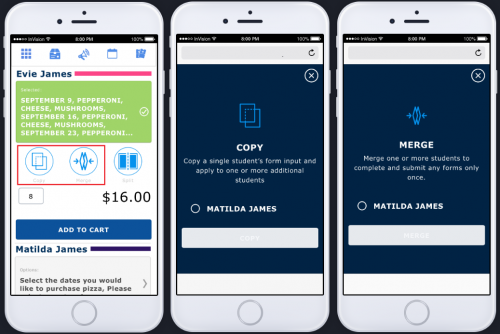
- For more information about the Copy, Merge, and Split functions, click on the links provided, or see related articles.
- Please note that once you add a product to your cart, you cannot Copy, Merge, or Split the form from that product with another student. The functions must be used before the item is added to your cart.
-
13
Tap on Add To Cart to add the product to your cart.
-
14
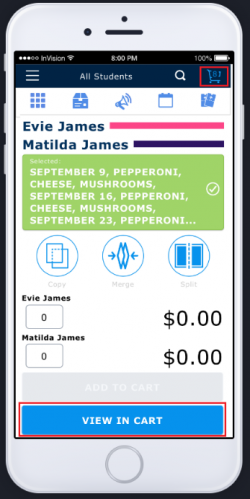
The number of items in your Cart will automatically be updated. If you wish to view the items in your cart, tap on the Cart icon at the top left-hand side of your screen, or tap on View In Cart.
-
15
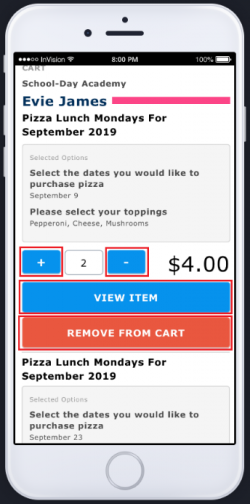
Tap and scroll up on your device screen to review all of the items in your cart. The items will be broken down by student, and each item will display the form options selected for each individual date.
-
16
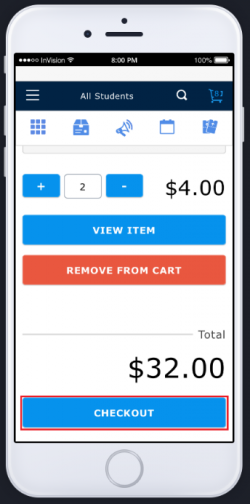
Tap on + or – to adjust the quantity of any individual item. Tap on View Item if you wish to view a selected item. Tap on Remove From Cart if you wish to remove the item.
-
17
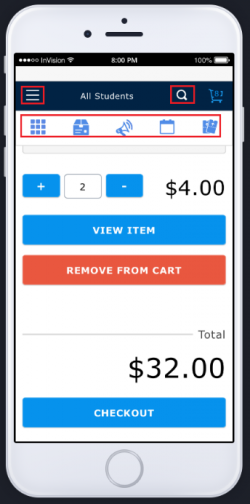
To continue browsing prior to checkout, tap on the three-line menu icon found on the top left side of the screen, tap on any of the banner icons or tap on the Global Search option to search for items.
-
18
To complete the order, scroll up on your device screen and tap on Checkout.
